CaLister |
|
CaLister |
|
This application will help you to easily retrieve certain events from your calendar.
The most important use case is when you want to retrieve all events in a time range with a specific name.
E.g. all events for a certain project of the last month to create an invoice. In that case you select the
appropriate calendar from the drop down, type a (sub)string that identifies the event, click the Last Month preset
button and then Search will list the appropriate events. You can now select all events and copy/paste them
into your invoicing application.
|
If you are working per hour then the easiest way is to use ReCal for accounting. This works perfectly when you're working at any Mac. |

|
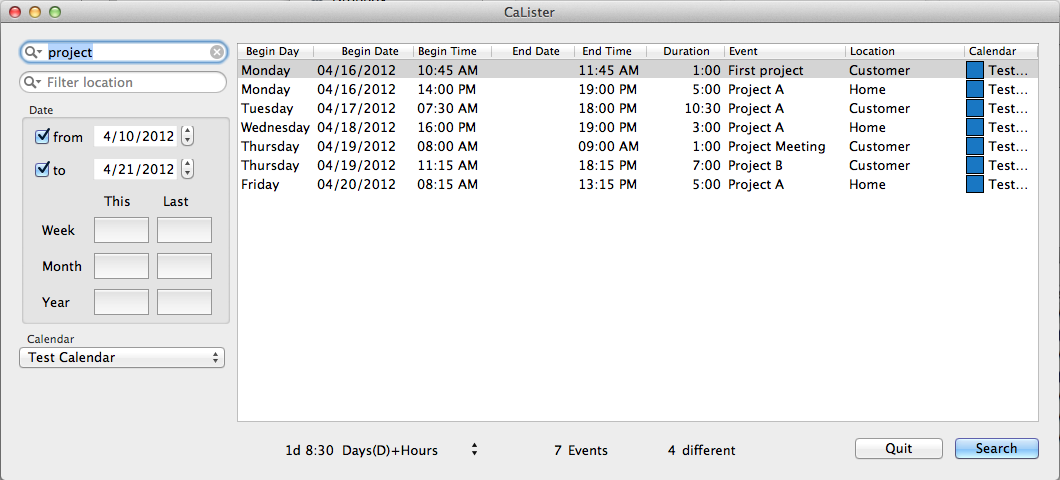
For the following description we assume the calendar entries in a specific week as shown below:

To quickly find out the description of a certain area just click into the screen shot below.
When CaLister is launched it will check all calendars available on your machine. These are placed in a drop down for selection. Note that if you have multiple calendars with the same name (which can happen when using multiple calendar accounts) these are marked with a (number) to make them unique in the list.
Once you have selected a certain calender it is used as default for the next launch of CaLister.
Starting from V2.0 you can configure CaLister so it displays all your calendars for multiple selection. Instead of a simple dropdown it will display something like
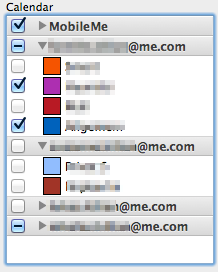
so you can select multiple calendars to be searched.
Description and Location of events can be filtered using any string you specify. The filter matches to any substring of an event. For example if you specify ‘project’ as filter then all ‘Project A’, ‘Project Meeting’ and ‘First project’ events will match.

Both filters create a dissection. That means if you filter by description ‘project’ and location ‘home’ you will get only

When you click the magnification glass inside any filter box you will find
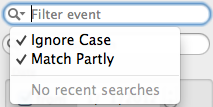
The Ignore Case option is checked by default (refer to
Profiles).
If you had unchecked this with the previous search then only ‘First project’ would have matched (since the others have an upper case P in Project).
This simlarly applies to Match Partly. If you uncheck this option only events matching in the full length are displayed.
E.g. ‘Project’ will not return a result. Only if you specify ‘Project A’ (or ‘project a’ with Ignore Case) will match four records.
The Date box allows to filter a date range. The From and To checkboxes activate the according filter range.
If none is selected all calender entries are respected. If only From is checked then all events starting from that date up to the current day are relevant.
If only To is checked all entries up to that date are relevant. Accordingly the range From/To is relevant if both are checked.
Inside the Date box there are six quick selectors which will preset the From/To values. The buttons in the This column
will only preset the From date with what is specified in the appropriate row (Week/Month/Year). Analogously the Last will set the correct
From and To dates.
The results are simply listed in a fixed tabular format. The Begin Day, Date and Time column show the date/time when the appropriate event starts.
End Date is only filled where it is different to Begin Date. End Time is the next minute after the event ends.
Duration is the caluclated event duration and displayed in hh:mm format. Event and Location simply hold the value of the according event property.
Calendar shows the calendar where the appropriate event occured. Of course above example is a bit silly as single calendar format was chosen and it will all be the same.
This column will likely only make sense if multiple calendar selection was
configured.
However, you can canfigure which columns appear via the
Profiles.
Additional to above shown colums you can
configure
the following to appear.
Notes will show the full or condensed (line breaks removed) contents of the notes (configurable via the
Profiles.
Alarms shows a tick where the event has one ore more reminders set.
It is also possible to double click a single row in the result window. This will open iCal in order to highlight the respective event.
The total time for all filtered events is displayed in the bottom part below the event list. The initial format is that of total 24 hours days plus remaining time (hh:mm):

The display format can be changed via the drop down

to
 and
and
 Here the
 Hours format just displays h:mm while Person Days+Hours calculates the number of person days (multiples of eight hours; refer to
Preferences)
plus the remainig time (hh:mm).
The setting for the total time display format is stored permanently.
The total number of events found by the last search is displayed in the bottom section of the main window.
The number of events with different description found by the last search is displayed in the bottom section of the main window.
Copy/paste into other applications like numbers works like all selections. Click and shift- or cmd-click the desired entries or use cmd-A to select all entries. Now you can use cmd-C / cmd-V to copy/paste the entries into any other application. Alternatively you can use alt-cmd-C to copy all entries at once. The single columns are separated with a TAB char.
When applied to all entries of above search the paste result in Numbers looks like the following:
 .
.
Some columns are obviously a simple copy of the results as displayed in CaLister. But you can
configure
them to be copied differently.
In this example the from- and to-date result in the single columns A and B instead of having 5 separate columns.
Further the duration is copied as decimal instead of hours and minutes. If the Alarms column is included it will contain the number of alarms set for the event instead of the check-mark displayed in the result list.
The preference parameters have changed a lot from V2 to V3. In V3 most of it is handled in so called profiles. The preferences windows just looks likes this:

In the top pane you can configure whether you prefer a single dropdown for the calendars or multi selection.
In the lower pane you can configure the number of hours for a person day which is used in the calculation of the total.
Starting from V3.0 it is possible to predefine searches via so-called profiles. These are named with an arbitrary but unique string.
The profile named with an empty string is loaded by default when CaLister is launched. To define a profile you can select the Profile menu or use cmd-shift-P.
A sample default profile looks like this:

If you save a profile with a name it will be added to the Profile menu.
Once saved or selected from the menu the filter criteria in the
main window
are replaced with those in the according profile.
You now can adapt these criteria if needed and press Search to update the result list.
The following settings are possible in the profile window.
Any string can be stored and will be moved to the main window filter. Also the Filter settings are respected.
If any of the buttons in the Date Range box are selected this will set the according range in the
main window.
E.g. you can define a profile that will search the last month per default. You can select any of the six range buttons.
To unselect one click it once again.
Depending on what Preferences you have chosen either the single or the multiple calendar selection is shown. You can define which calendar(s) to include in a search. Note that when switching between single and multi calendar in the Preferences the settings for stored profiles get lost.
As mentioned above you can configure which columns appear in the result list and which columns are copied during a cmd-C.
In the Copy/Display table you find the single columns which are supported. Column contains the name of the calendar column.
Show holds a checkbox which tells whether the according column is shown in the result list. In the above examples the Alarms and Notes are suppressed.
Copy tells if/how the column is copied. A simple checkmark is found in most rows. Others have different formats for copying and thus a drop-down.
Begin Time has this selection:
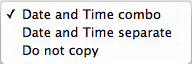 .
The first selection was active in above example so a single time/date value was copied.
The second option will copy date and time as two separate columns (likely not to be used if you paste into Numbers but to a plain text file).
The third option will omit the start time completely from the paste buffer
.
The first selection was active in above example so a single time/date value was copied.
The second option will copy date and time as two separate columns (likely not to be used if you paste into Numbers but to a plain text file).
The third option will omit the start time completely from the paste buffer
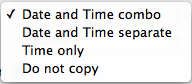
End Time has this selection:
 .
The first, second and last line have the same meaning as for
.
The first, second and last line have the same meaning as for Begin Time.
The third will only copy the time of day. You can use that for pasting into a text file where all events begin and and in the same day like for a common invoice.
Duration has this selection:
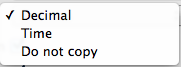 .
If the first option is selected the duration is converted to a decimal number. Whole numbers are full hours and the fraction represents the minutes.
E.g. 1.5 is equal to one hour and 30 minutes. The second option will copy the duration as h:mm (e.g. 1:30 for one hour and 30 minutes).
The last option will omit the duration from the paste buffer.
.
If the first option is selected the duration is converted to a decimal number. Whole numbers are full hours and the fraction represents the minutes.
E.g. 1.5 is equal to one hour and 30 minutes. The second option will copy the duration as h:mm (e.g. 1:30 for one hour and 30 minutes).
The last option will omit the duration from the paste buffer.
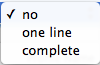
The Notes display columns shows this selection:
 .
Besides turning off the notes display with the first entr you can either show the notes on
.
Besides turning off the notes display with the first entr you can either show the notes on one line or complete with line breaks.
For each profile you can define how the displayed columns in the result list are sorted. Simply select the sort column from Add Column.
It will be added to the table above. The order of the rows in the table also determines the order for sorting the single columns.
The example above shows Begin Time as fist row with ascending order. You don't need to define it in this way as this is the default sort order.
(It has been shown just for demonstration purposes.)
Only if you want multiple sorting (e.g. Begin Time and then Duration) you must specify it.
To change the sort order for any column you need to select the drop-down in the Sorting column:
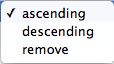 .
In the same you can remove a column from the sort list.
.
In the same you can remove a column from the sort list.
If you open CaLister for the first time you should set the default profile, especially for setting the default calendar(s).
Open it from the Profile main menu or via alt-cmd-P. Now define the calendar(s) and click Save.
This will set the default calendar(s) you want to search when launching CaLister.
To define additional search profiles simply type an arbitrary but unique name in the Profile Name.
The drop-down also holds all stored profiles so you can edit them. When you click Save the current values are stored with the according Profile Name.
This way you can load an existing profile, adapt it and save it with a different name.
Each saved profile appears in the drop-down under Profile Name and in the main menu under Profiles.
To remove an existing profile select it from the drop-down and click Remove. This will also remove it from the main menu.
I have written this litte app for my personal use. That means my (limited) use case is fully covered by what the app currently does. In the likely case that your use case is different from mine just drop me a line and I'll see what can be done. The current version was inspired by a number of feature requests.