CaLister
|
|
CaLister
|
|
This application will help you to easily retrieve certain events from your calendar.
The most important use case is when you want to retrieve events in a time range eventually with a specific name.
E.g. all events for a certain project of the last month to create an invoice. In that case you would once define a
profile with the appropriate search parameters like the calendar(s) the time range Last Month and eventually
some string parameter to limit the result set. Now you can simply select that profile by its name and run the Search.
|
If you are working per hour then the easiest way is to use ReCal for accounting. This works perfectly when you're working on any Mac. |

|
This version is localized for English and German language along with imperial and metric units. This help, however, is just written in English and I will not translate this to German - unless a kind soul will pay for it, which is unlikely to happen.
Compared to the previous version, this beta release offers a couple of new features:
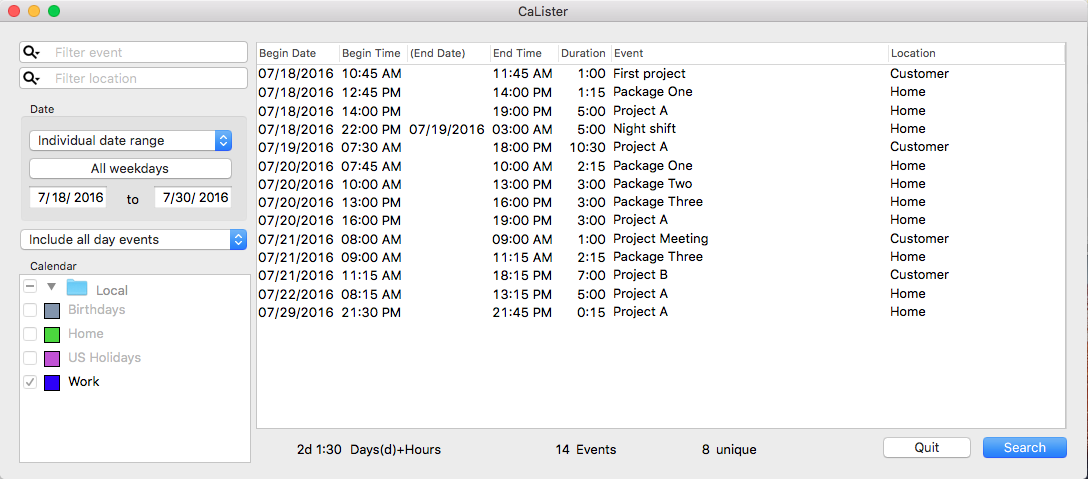
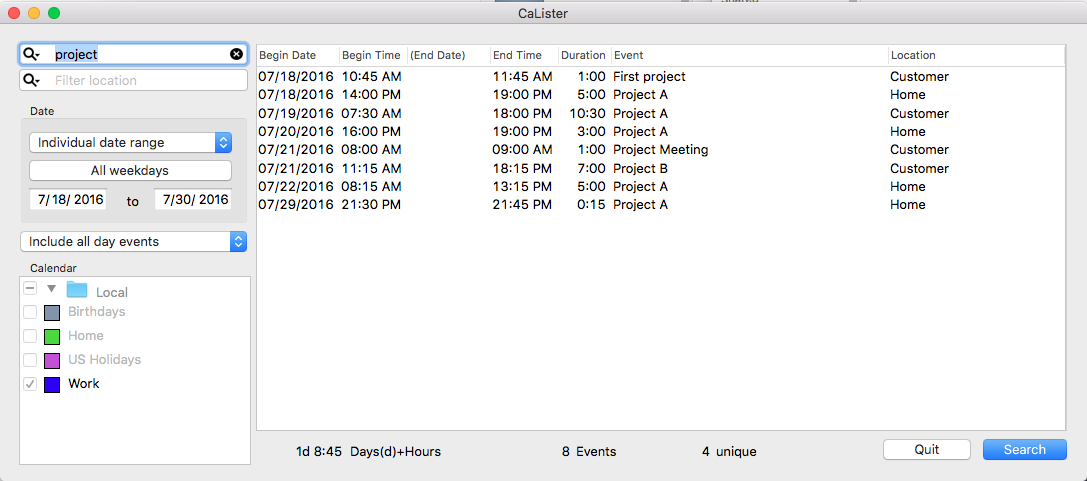
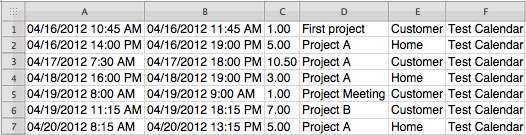
For the following description we assume the calendar entries in a specific week as shown below:

To quickly find out the description of a certain area just click into the screen shot below.
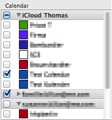
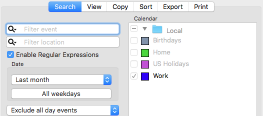
When CaLister is launched it will check all calendars available on your machine. As can be seen, the calenders are group like in Calendar.app and you can select the single calendars or a whole group. When running a search, only the selected calenders will be looked at.
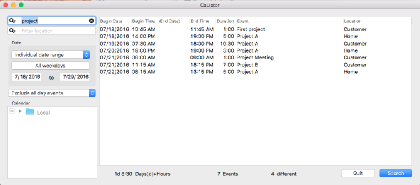
Description and Location of events can be filtered using any string you specify. The filter matches to any sub-string of an event. For example if you specify ‘project’ as filter then all ‘Project A’, ‘Project Meeting’ and ‘First project’ events will match.
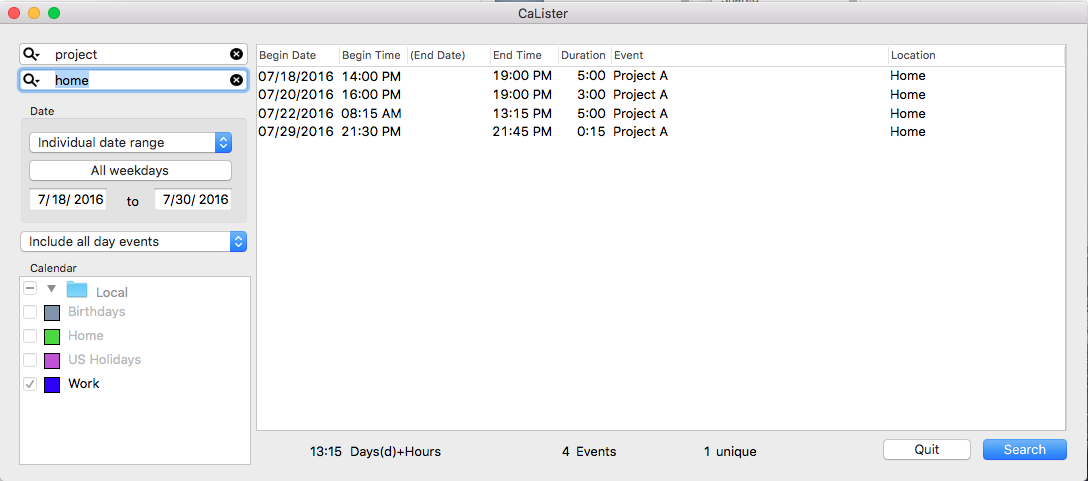
Both filters create a dissection. That means if you filter by description ‘project’ and location ‘home’ you will get only those events which you titled 'project' and located at 'home'.
When you click the magnification glass inside any filter box you will find the options shown right.
The Ignore Case option is checked by default (refer to
Profiles).
If you had unchecked this with the previous search then only ‘First project’ would have matched (since the others have an upper case P in Project).
The 'Match Whole String' will list only those events that match completely the entered string (respecting spaces as well).
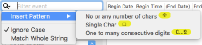
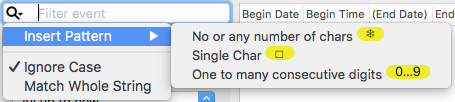
For a more advanced search you can use 'Insert Pattern', which allows for arbitrary characters. 'No or any number of chars' will match exactly as it says.
So, if you enter a pattern like
 it will match 'cats', 'cows', 'cassandra' or simply 'cs'. The 'Single Char' pattern
 in contrast would only match 'cassandra'.
Finally a pattern with 'One to many consecutive digits' like
in contrast would only match 'cassandra'.
Finally a pattern with 'One to many consecutive digits' like
 would match 'a1995b' but not 'a19b' (since there needs to be at least one additional digit between 'a19' and 'b'.
The Date box allows to filter a date range. The drop-down allows a quick access to commonly used date ranges, also by using keyboard shortcuts:
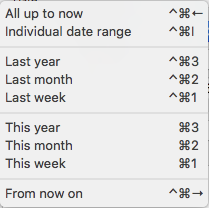
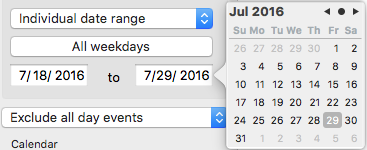
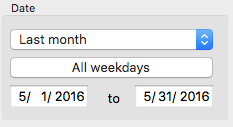
Individual date range will just place the focus to the start date (makes more sense when using keyboard shortcuts). All other menu entries will set start and end date
to whatever one would expect. The open ended ones are limited to 1/1/2000 for start and current date plus two years for the end (since recurring events would else overflow the result list).
Anyhow, you can modify start and end at your wish.
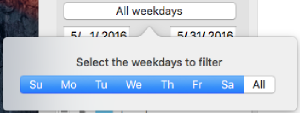

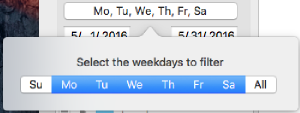
Additionally it is possible to filter for certain week days. By
 -clicking
the single weekdays you can select individual ranges.
-clicking
the single weekdays you can select individual ranges.
The drop down below the date selection specifies what to do with all-day-events. It is possible to
The results are simply listed in a fixed tabular format. The Date and Time column show the date/time when the appropriate event starts.
(End Date) is only filled where it is different to Begin Date. End Time is the next minute after the event ends.
Duration is the calculated event duration and displayed in hh:mm format. Event and Location simply hold the value of the according event property.
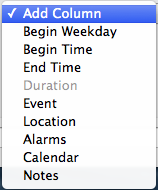
Additionally to above shown columns you can configure the following to appear.
Begin Day will display the weekday of the appropriate date.Calendar shows the name of the calender where the displayed event was found. This column will make sense only if you are searching in multiple calendars.Notes will show the full or condensed (line breaks removed) contents of the notes (configurable via the
Profiles).
Alarms shows a tick where the event has one ore more reminders set. Note that when copying this column, it will contain the number of reminders being set.
So usually this will be zero or one (but might also be a bigger number).
It is also possible to show the
Weekday which will display the name of the according weekday.Further you can double click a single row in the result window. This will open Calendar.app and its view of the respective event. Note that Apple made it overly complicated to highlight the event in Calendar. app, so it is only shown in the currently set view.
In the bottom line below the search results you will find a number of summaries:
 You can configure further formats (hours only and working hours) with
Profiles.
You can configure further formats (hours only and working hours) with
Profiles.
With version 4.0 of CaLister you can also show summaries for events and locations per search (see Profiles):
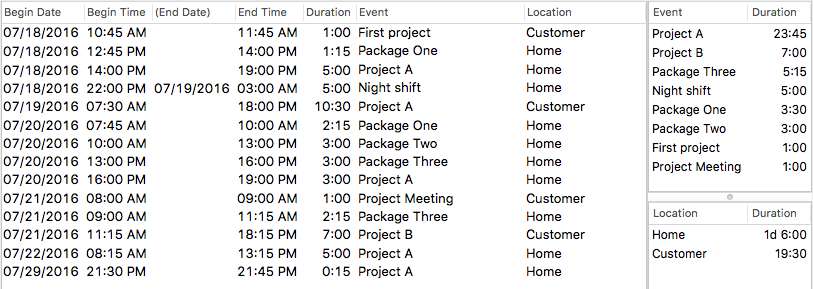
The results in the summaries are always ordered descending to their total lengths.
Copy/paste into other applications like numbers works like all selections. Click and shift- or
-click
the desired entries or use
-A
to select all entries.
Now you can use
-C
-V
to copy/paste the entries into any other application. Alternatively you can use
 --C
to copy all entries at once.
The single columns are separated with a TAB char.
--C
to copy all entries at once.
The single columns are separated with a TAB char.
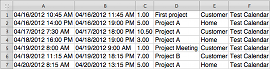
A couple of entries pasted into Numbers could look like this:
You can
configure
which columns shall be included in a copy operation.
In this example the from- and to-date result in the single columns A and B instead of having 5 separate columns.
If the Alarms column is included it will contain the number of alarms set for the event instead of the check-mark displayed in the result list.
You can copy the event summaries with
-E
and the location summaries with
-L.
Both will copy the rows/columns as displayed.
While copy paste is an easy way to transfer search results to spreadsheets, a CSV export can alternatively be used for this. Further a CSV export can be used for other programs as input (e.g. to create invoices).
You can configure folder, filename (with patterns) and format in the
Profiles.
An export can be issued from the File/Export menu for either the current selection or the whole table.
One of the great strengths of CaLister is the ability to store so-called profiles that define a whole reusable search. The profiles are named with an arbitrary but unique string.
The profile named with an empty string is loaded by default when CaLister is launched. Profiles are defined via CaLister/Settings or
-,
and can be selected later from the Profile menu.
Starting from V4 of CaLister the profile has been split into six tabs:
Filter, time range and calenders can be set like in the
main window
Only if you specify Individual date range you can not enter the individual dates since that would not make much sense.
Instead you will be asked to enter the dates when the profile is loaded in the
main window.
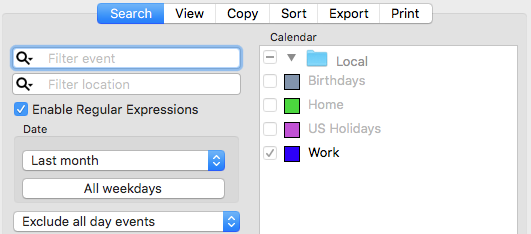
For a even more advanced search than the above mentioned patterns you can Enable Regular Expressions.
If you don't know what that is you should not turn this option on (you may refer to
RegEx101).
Once this option is turned on you will find an additional flag in the magnification glass option list of search fields that allow you to interpret the entered text as regex.
With the View tab you can define which calendar columns shall appear in the
main window
You can add single columns by selecting them from the drop down below the table.
To remove a column use the
 button. Rearrange the order simply via drag and drop of the shown column names.
Most of the available columns are self-explanatory. The
button. Rearrange the order simply via drag and drop of the shown column names.
Most of the available columns are self-explanatory. The (End Date) (with the brackets) will make the date only show if it is different to the start date and else left blank.
The Notes (compressed) will show the notes of the event on a single line with line breaks removed and eventually truncated.
When using Notes the notes will eventually stretch over multiple lines, though also being clipped to the width of the column.
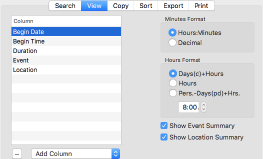

With Minutes Format you can switch between decimal and hours:minutes format for the displayed duration values.
The selection Hours Format allows to switch between 3 formats for the "larger" time part.
Days(d)+Hours will calculate the number of full days (24 hours) and the remaining hours. So if e.g. 25 hours are to be displayed you will see 1d 1 for one day and one hour.
Note that the displayed minutes format always depends on the chosen value above.
Hours will just display the hours as they are summed up (that is 25 in the above example).
Pers.-Days(pd)+Hrs. will additionally show a field to enter the time (hours and minutes) which defines a person day (usually that would be something like 8 hours).
So for above example with a setting of 8 hours per person day you would see 3pd 1 (since 3*8+1 = 25).
The lower two check boxes control whether any of the event/location summaries will be shown for a search.
This tab allows to configure which calendar columns shall be included in a copy operation.
Similarly to the previously described tab you can add, remove and re-arrange columns you want to have copied. Although most of the column names are self-explanatory here is a list of the possible choices:
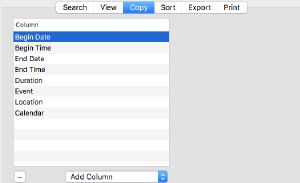
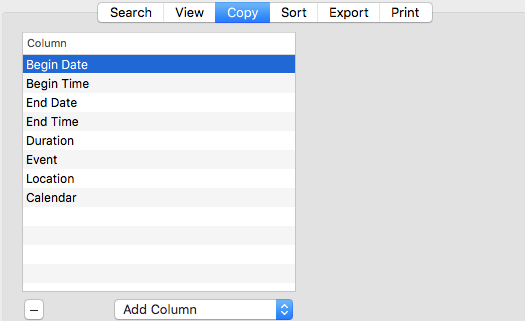
All columns are separated with a tab character which will usually allow to paste them in applications like Numbers so they appear in separate columns.
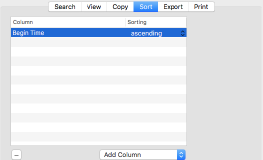
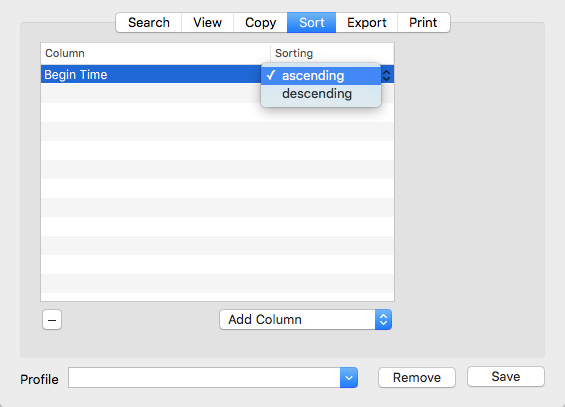
The Sort tab allows to define sorting criteria to be applied to search results. Per default the results are sorted ascending by begin time.
To add new sort criteria simply select them from the drop down shown right and they will be added to the list which will open from the
Add Column popup button.
 .
.
If you want a different sorting order you can add from the Add Column, drag them to the right postition or remove them with the
button. Ascending or descending is defined in the Sorting column.
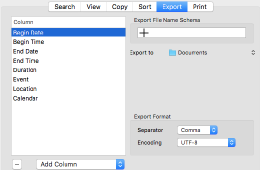
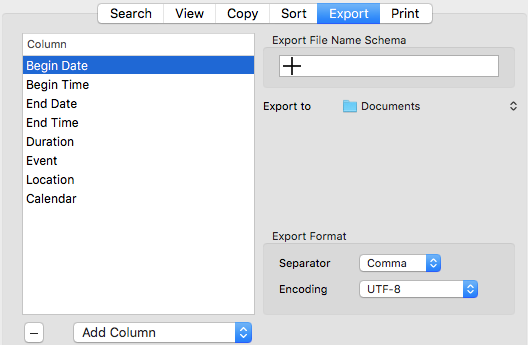
In order to export search results to CSV files you can use this profile tab. Similarly to the tabs explained above, you can add single columns to be exported with the list to the left. The export will contain the columns in the order as the appear in this list.
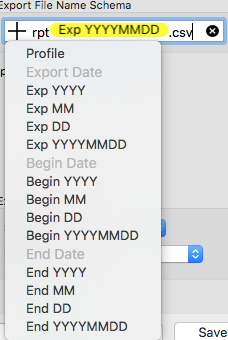
To ease naming of the export file, the Export File Name Schema input box takes plain text plus a number of patterns that can be added with the plus symbol.
Once you issue a File/Export/... the pattern will be expanded and set as default in the save dialog which points to the Export to folder.
Note that the input box is rather narrow and when using the pattern tokens it might be necessary to scroll with the cursor to see the whole file name pattern.
Finally, in the Export Format box you can change parameters for the export format.
Character encoding is preset to UTF-8 but for legacy/interoperatibility you can change that to be Mac-OS Roman or Windows CP1252.
Further the separator can be changed from comma to semi-colon or tab.
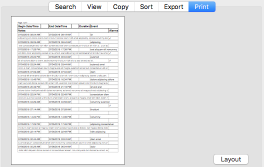
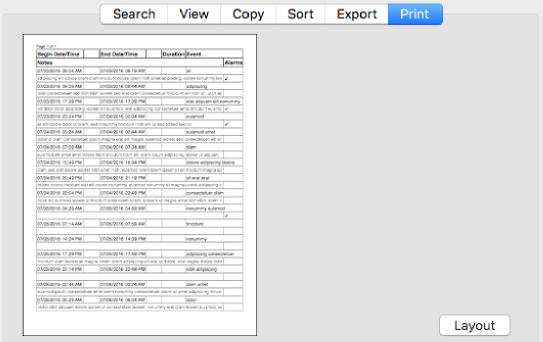
CaLister will use a default layout that likely fits most use cases. However, it is easy to adapt layouts for the individual needs and you can have an arbitrary number of different reports (see below).
To create a layout you need to press the Layout in the Print tab. It is advisable to run a search before starting the layout
since the search results will be used to create a live preview. Else some random text will be created for the preview.
The lower part of the settings menu contains a text field for the profile name, a Remove and a Save button.
Once you made your settings you can type an arbitrary string in the text field and click Save.
This will silently overwrite any existing profile with that name. Further it will add an entry to the Profiles menu and amend the App title.
Once saved, the filter criteria in the
main window
are replaced with those in the according profile.
To modify an existing profile you can use the drop down of the text field which will offer the already defined profiles to load them.
Once selected, the criteria are directly applied to the main window. Further the profile name is appended to the App title.
Finally to remove a profile you select the desired name from the drop down.
When clicking Remove, the profile is removed from the Profiles menu.
In order to duplicate (and then modify) any exiting profile, just select the existing one from the drop down and save it with the new name. You now can safely make changes to the new profile.

The layout window will open from the Print tab of the
Profiles
and allow to define an individual page layout. The idea behind the layout is to let the user set just a few parameters and CaLister do the rest.
Each calendar entry is printed in a block of one to four lines where you can place the single columns in a way that you prefer. The paper format is chosen
(mainly to use either landscape or portrait), font can be set for headings, text and notes and header/footer can also be set with some general parameters.
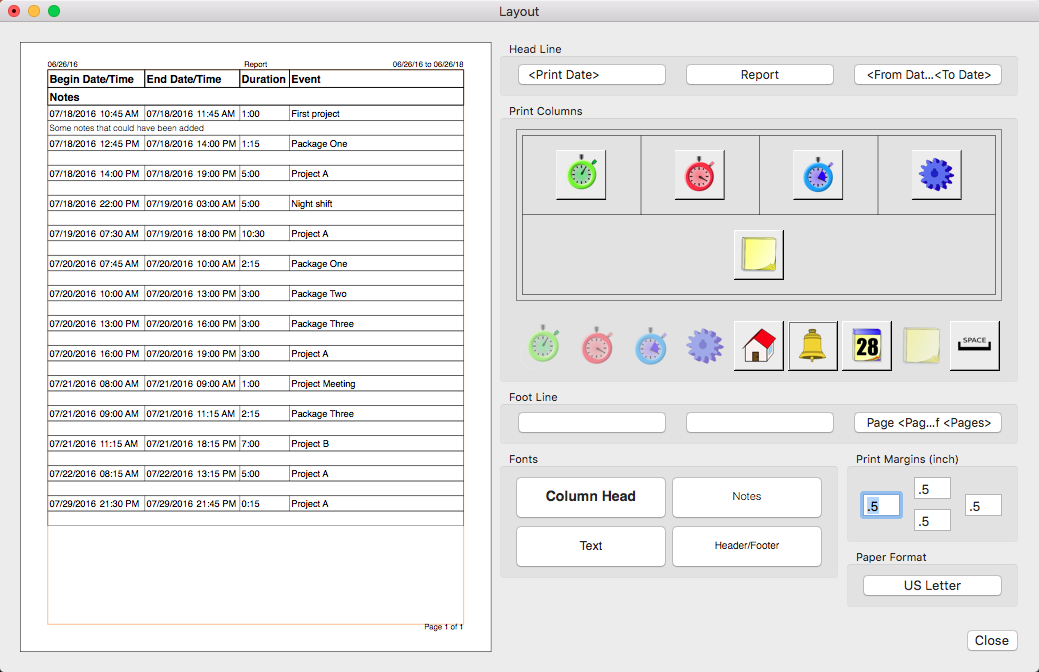
The preview pane on left side shows a life preview of the print layout. It takes the data from the current search. If no search has been run you will see some random text. The orange colored frame indicates the print border inside which the search results will be printed. You can modify these bounds by entering the measure directly in the input fields attached to the borders. For non-metric locale the values are interpreted as inch, else these are centimeters.
This box is the main configuration of the layout. Basically you will drag the single search result columns in, out and around the box where they can be arranged in a simple grid.
The two screen shots below demonstrate the effect of a space being placed between two columns:
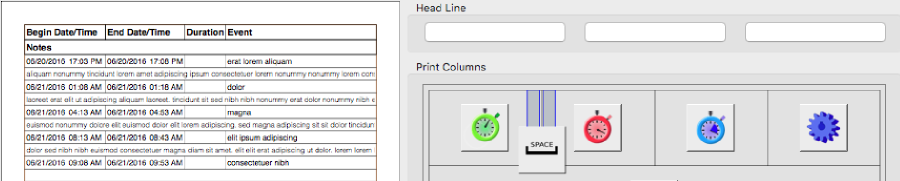
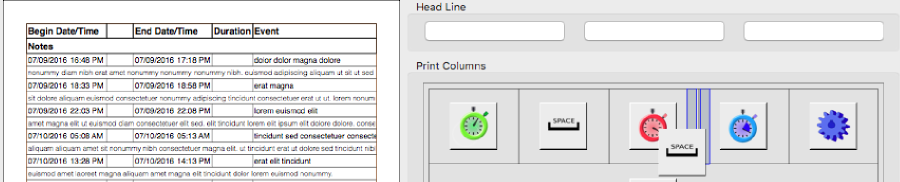
As can be seen, the insert position is being highlighted during dragging a column icon. Dropping one icon over another on will cause the underlying to be removed.
Dragging an icon outside the Print Columns box will also remove it from the layout.
Positionining a new icon top or bottom of an existing icon will add a new print line, but only a maximum of 4 lines per event is supported.
Following are the print columns you can define:
![]() Start time,
Start time,
![]() End time,
End time,
![]() Duration,
Duration,
![]() Event,
Event,
![]() Location,
Location,
![]() Alarms,
Alarms,
![]() Calendar and
Calendar and
![]() Notes,
Notes,
![]() Space.
Space.
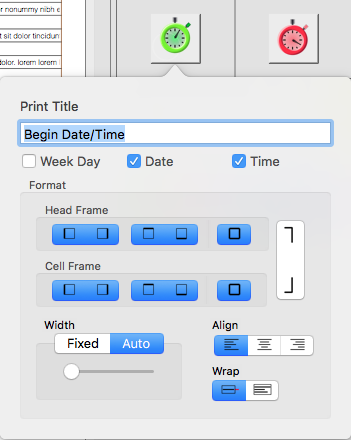
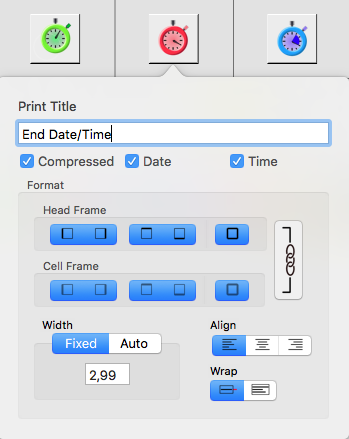
Each column in a row can be edited by clicking the symbol representing its contents. This opens a pop-up menu with various layout options for each of the buttons.
The contents of the Print Title box will be shown in the title box of each print page for the according column. The text is set to some default when the column is defined initially but can be changed to any text.
Right below, there can be show different options depending on the column.
The Begin Date/Time has tick marks for Weekday, Date and Time to be displayed in the column.
The End Date/Time has a Compressed option which will suppress the date if it's the same as the begin date.
Other columns will not show any options in this place.
The Format box below allows to define a frame, the final width, truncating and adjustment of the column.
The two rows Head Frame and Cell Frame are used to turn on and off frame lines for the header and the cells itself.
Both head and cell can be set individually, but by clicking the bracket button right to them both will be linked (symbolized by a chain shown in the button and the
cell line being greyed out).
The Width box has two tabs: Fixed and Auto. When setting the width to fixed (inches in US and centimeters where locale uses metric units),
the column will appear in exactly that size. Eventually the text in the cell will be trunctated or wrapped, depending on what has been set (see below). However, the auto-mode should be preferred.
It will determine the maximum size for each column and add flexible space so the page gets filled. The slider in the auto-box determines the weight of a column: the more right, the higher it is.
This weight is respected when doing the calculation for the flexible space each auto-column will take. Usually you can leave it to the default values.
The adjustment per column can be set to left, center and right. Per default all columns appear with left adjustment.
Whether a single column is trunctated or wrapped (when the column width is too narrow) can be controlled with the Wrap switch.
In the left position text cells will be trunctated and to the right the will be wrapped. The latter is done per word. If a column is set too narrow it might result in unpleasant layouts.
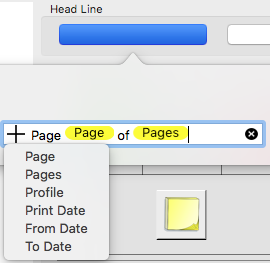
There are 6 buttons to define header and footer text left, center and right. Once you click any of them a pop-up will open where you can enter any text to appear at the appropriate position on the print page.
You can mix plain text with a number of patterns that can be inserted with the plus symbol inside the input box. The patterns will be replaced with what their name says at time of printing.
For the expample to the right the text Page 1 of 2 and Page 2 of 2 would be rendered for the two pages of an assumed search result. Since this was defined for the top left
of the page, these texts will appear top left of any print page.
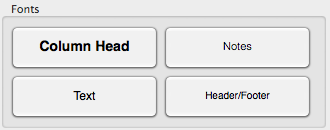
The fonts being used in the printout belong to four groups: column title, text, notes and header/footer. The first is used generally for the column header text. The single events are printed using the text font, except for the notes which use the notes font. It is assumed that notes text is larger than all other column text and thus might appear in a different (generally smaller) font. Also headline and foot line have a separate font (being even smaller).
Once you click one of the font buttons the standard font window will open and you can set an arbitrary font. The same font will also be rendered for the button title. So if you choose a very large font size the according title might get truncated.
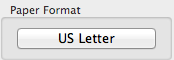
Last but not least you can set the paper size and orientation per profile. Clicking the button inside the Paper Format box will open the
default paper format settings. Note that the bounds will be set to 1/2" (non-metric) or 1cm (metric) once the paper format is changed regardless of what you choose
inside the standard dialog.
Once I wrote this app for my personal use. And ever since I got a lot of feedback so I added a number of features. In case that your use case has still more requirements just drop me a line and I'll see what can be done. You may write in either German or English.
--C
to copy all results